Flag Quilt & How to make all those little blocks fast
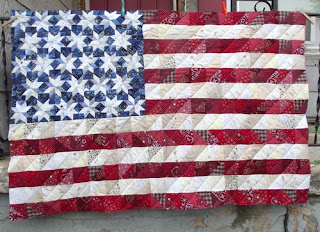
Every 4th of July and Memorial Day I would think Man, I wish my flag quilt was finished so I could hang in on the front porch rail. So I finally got my hiney in gear and finished it this July. In fact, on the 4th of July everything was done except hemming the edges.
It is made of a BUNCH of half-square-triangle (HST) blocks and I'm going to show you how to make a stack of them quick as a wink. We'll also look at how the flag was put together.
I used a rotary cutter and cutting mat to cut long strips of fabric four inches wide. Just fold the fabric a few times so it will fit on your mat, slice the end off with the rotary cutter so you have a nice, neat edge, then cut four inches off the end. If you're having trouble visualizing that, here is a video by youtuber mdhaworth that demonstrates it very well.
My cutting mat is smaller so I have to fold my fabric an extra time or two. Remember you need 4-inch wide strips for the flag quilt. Unfold your strips and stack about four layers of fabric strips very neatly, one on top of the other, making sure all the edges match up, then cut 4-inch squares using the same method as the strips.
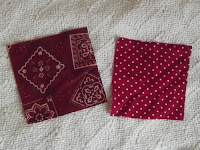
For this flag quilt, I used several different shades and patterns of red fabrics, blue fabrics, and whites and tans.
Take two different red squares and stack them with right sides together. Now we're ready to sew. I have a really old singer with a simple needle and presser foot. It is 1/4 inch from the edge of the presser foot to the needle and that's just what we need. Newer machines can adjust the needle position left, center, or right; put your needle so that you have 1/4 inch from the left side of the presser foot to the needle.
Line the left edge of your presser foot with the corner of your squares. You want your seam to land 1/4 inch from the center line. Lots of quilters measure and mark lines. I just eye-ball it and aim for the opposite corner.
Keep doing this until you have about 10 of these connected like a kite tail. A Lamborghini poster is essential to the success of your quilt. Trust me.
Pull a little slack in your thread. You can cut it or not. I don't. Pivot your kite tail around and sew a line down the other side of the squares.
Once you've sewn the other seam down your squares, you're ready to cut the threads between the squares, cut down the center between your seam lines, and finger-press your squares open.
Now you have 20 half-square-triangle blocks. You need a butt-load more. When I was working on mine, I would sew blocks until I had enough to sew together to make a flag stripe.
The long stripes at the bottom of the flag took 20 blocks.
The short stripes at the top of the flag took 11 blocks.
All in all you need 140 red blocks and 120 white blocks. Wow. That's a lot. Don't think about it. Just turn on your radio and sew.
Don't Do The Stupid Thing I Did... most of my stripes were sewn together with the upper triangle pointing left. Two of my red stripes were sewn together with the upper triangle pointing right.
I didn't notice this until I was sewing my stripes together and I couldn't just flip the stripe around and make it right; it was still the same. The only way to fix it would have been to rip all those little seams where the blocks were sewn together and redo them. Oh no. Hell no.
It's not noticeable now that the quilt is all together but it really bummed me at the time. Not bummed enough to redo it but, you know, a mini-bum.
Moving on. Sew all the long stripes together, then sew all the short stripes together. But don't put the long ones with the short ones yet, you need the blue field of stars first.
Continued in next post!


What is the final size for the quilt? I want to make one that is standard flag size which is a 4x6.
ReplyDeleteHow many yards of each fabric do you need for this quilt? I have the same question as above: what are the final dimensions of this quilt?
ReplyDeleteThanks so much.